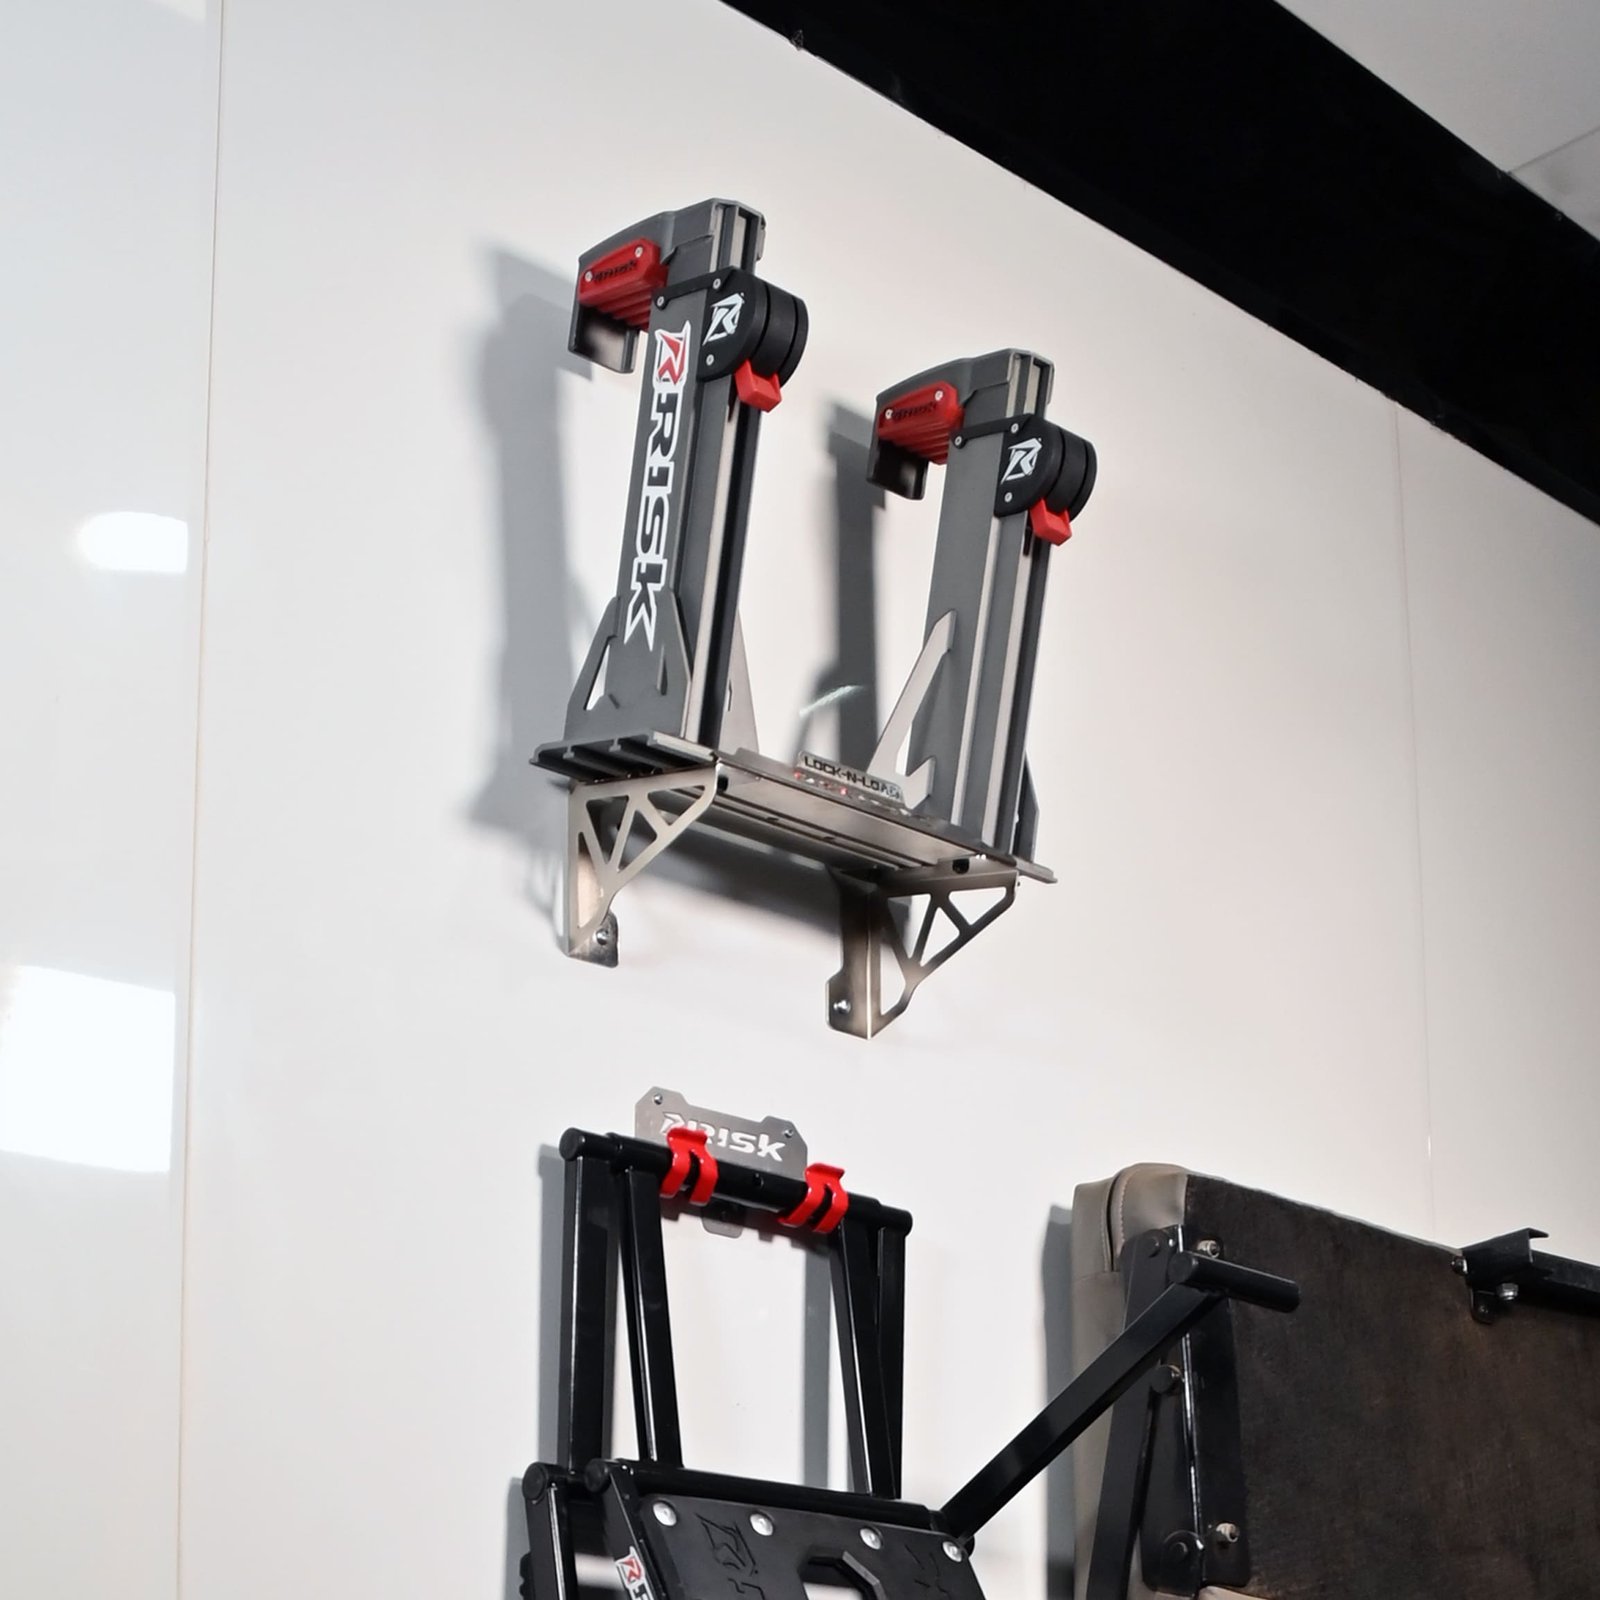
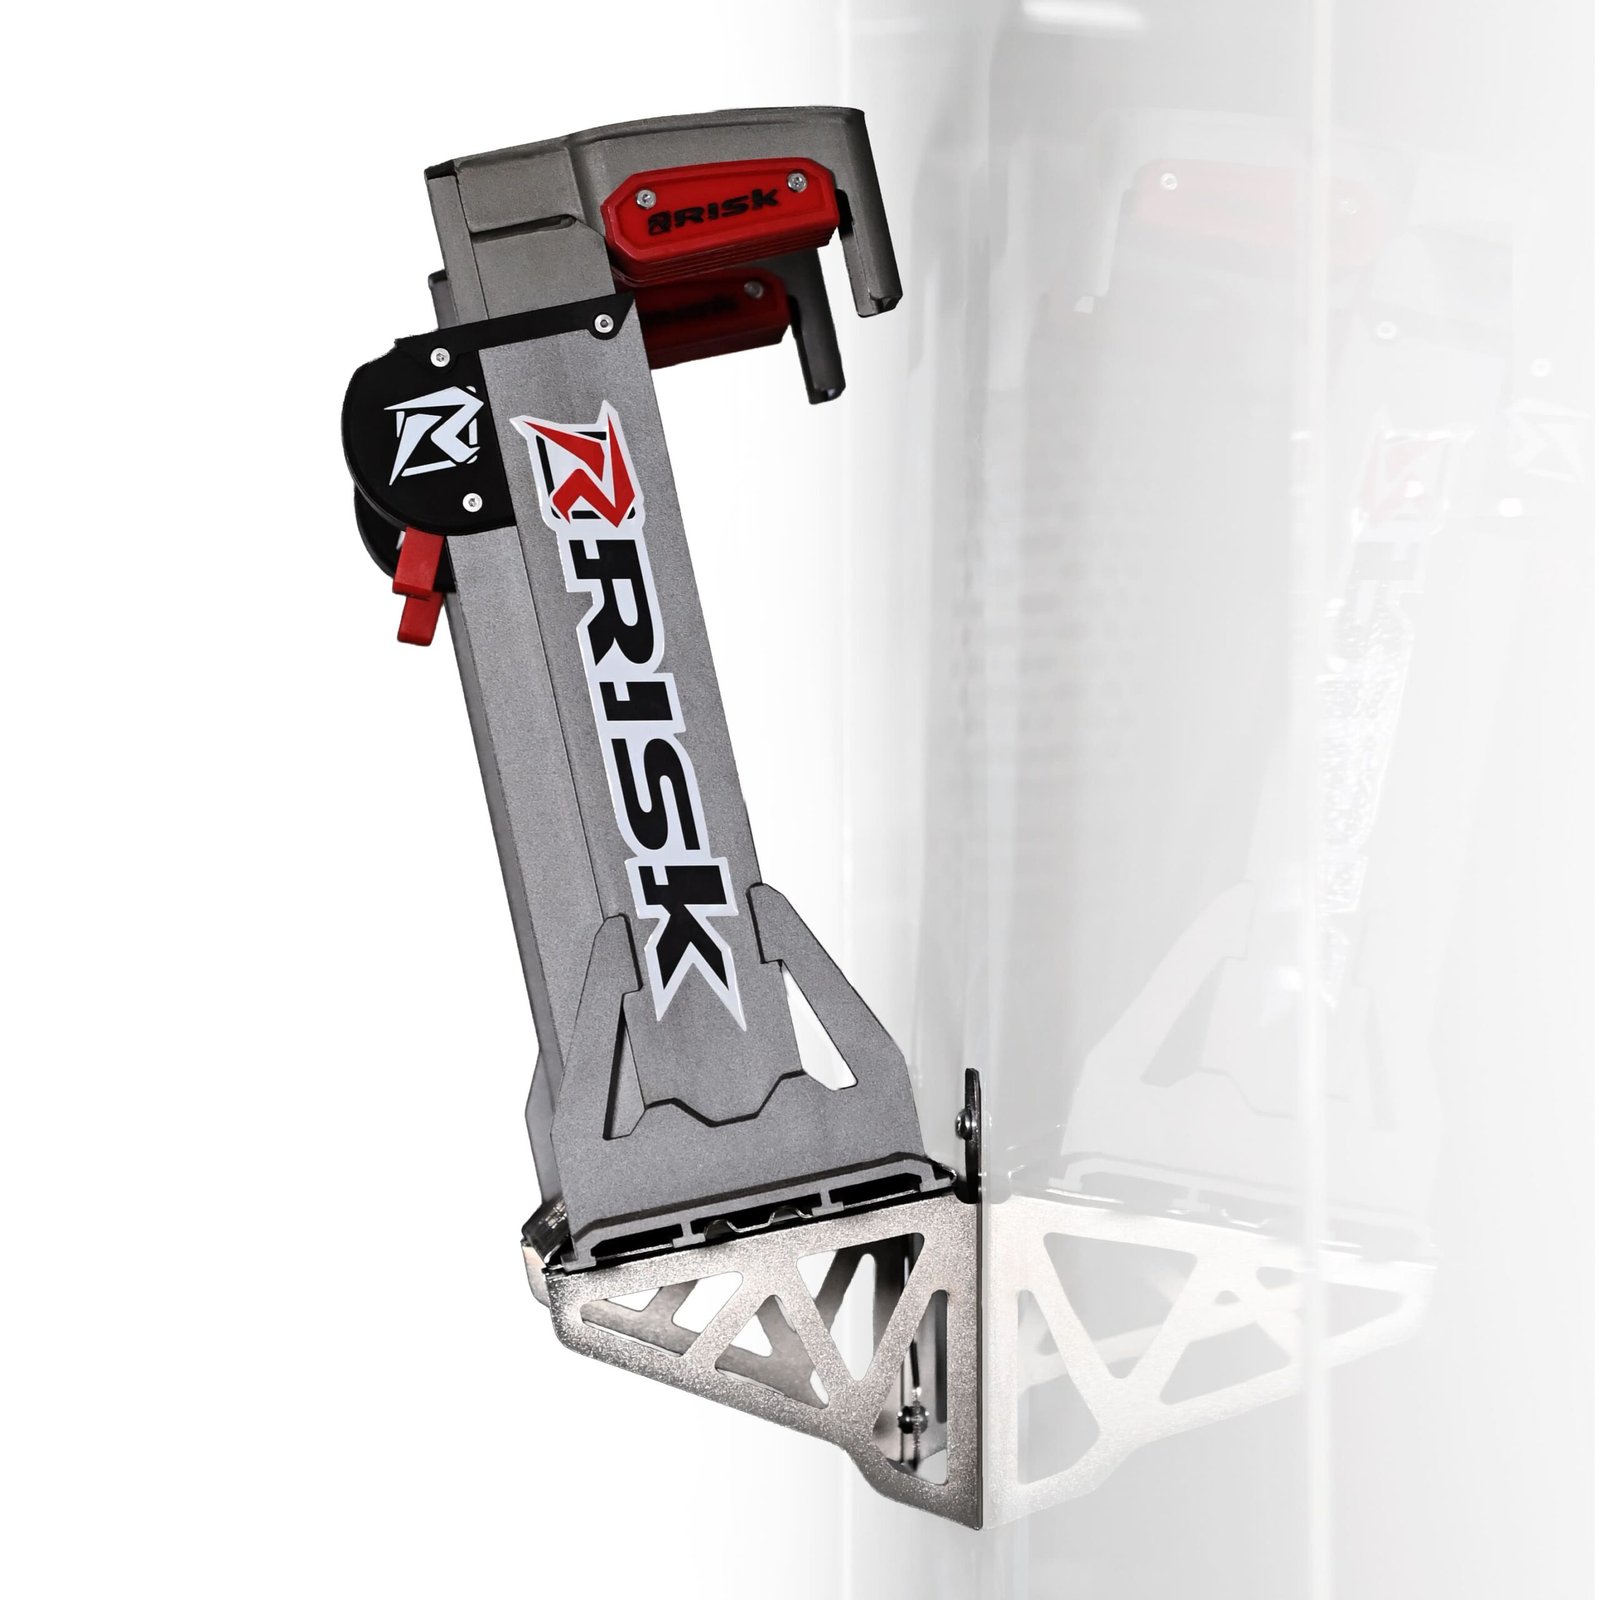
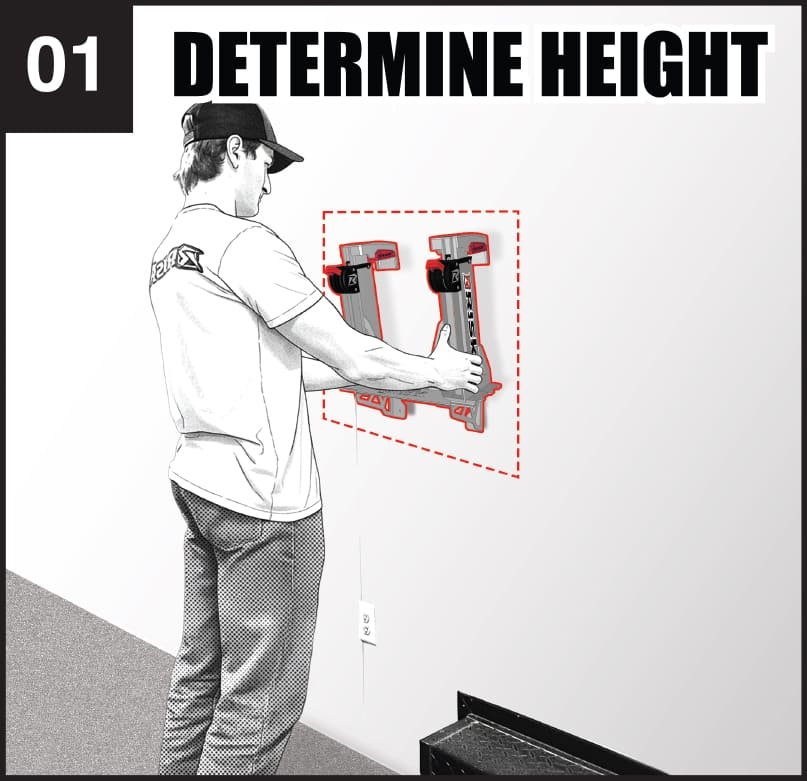
Step 1: Choose your mounting location. Keep in mind that the arms will project from the wall at a slight angle. Select a height that clears bike handlebars, foreheads, and other equipment.
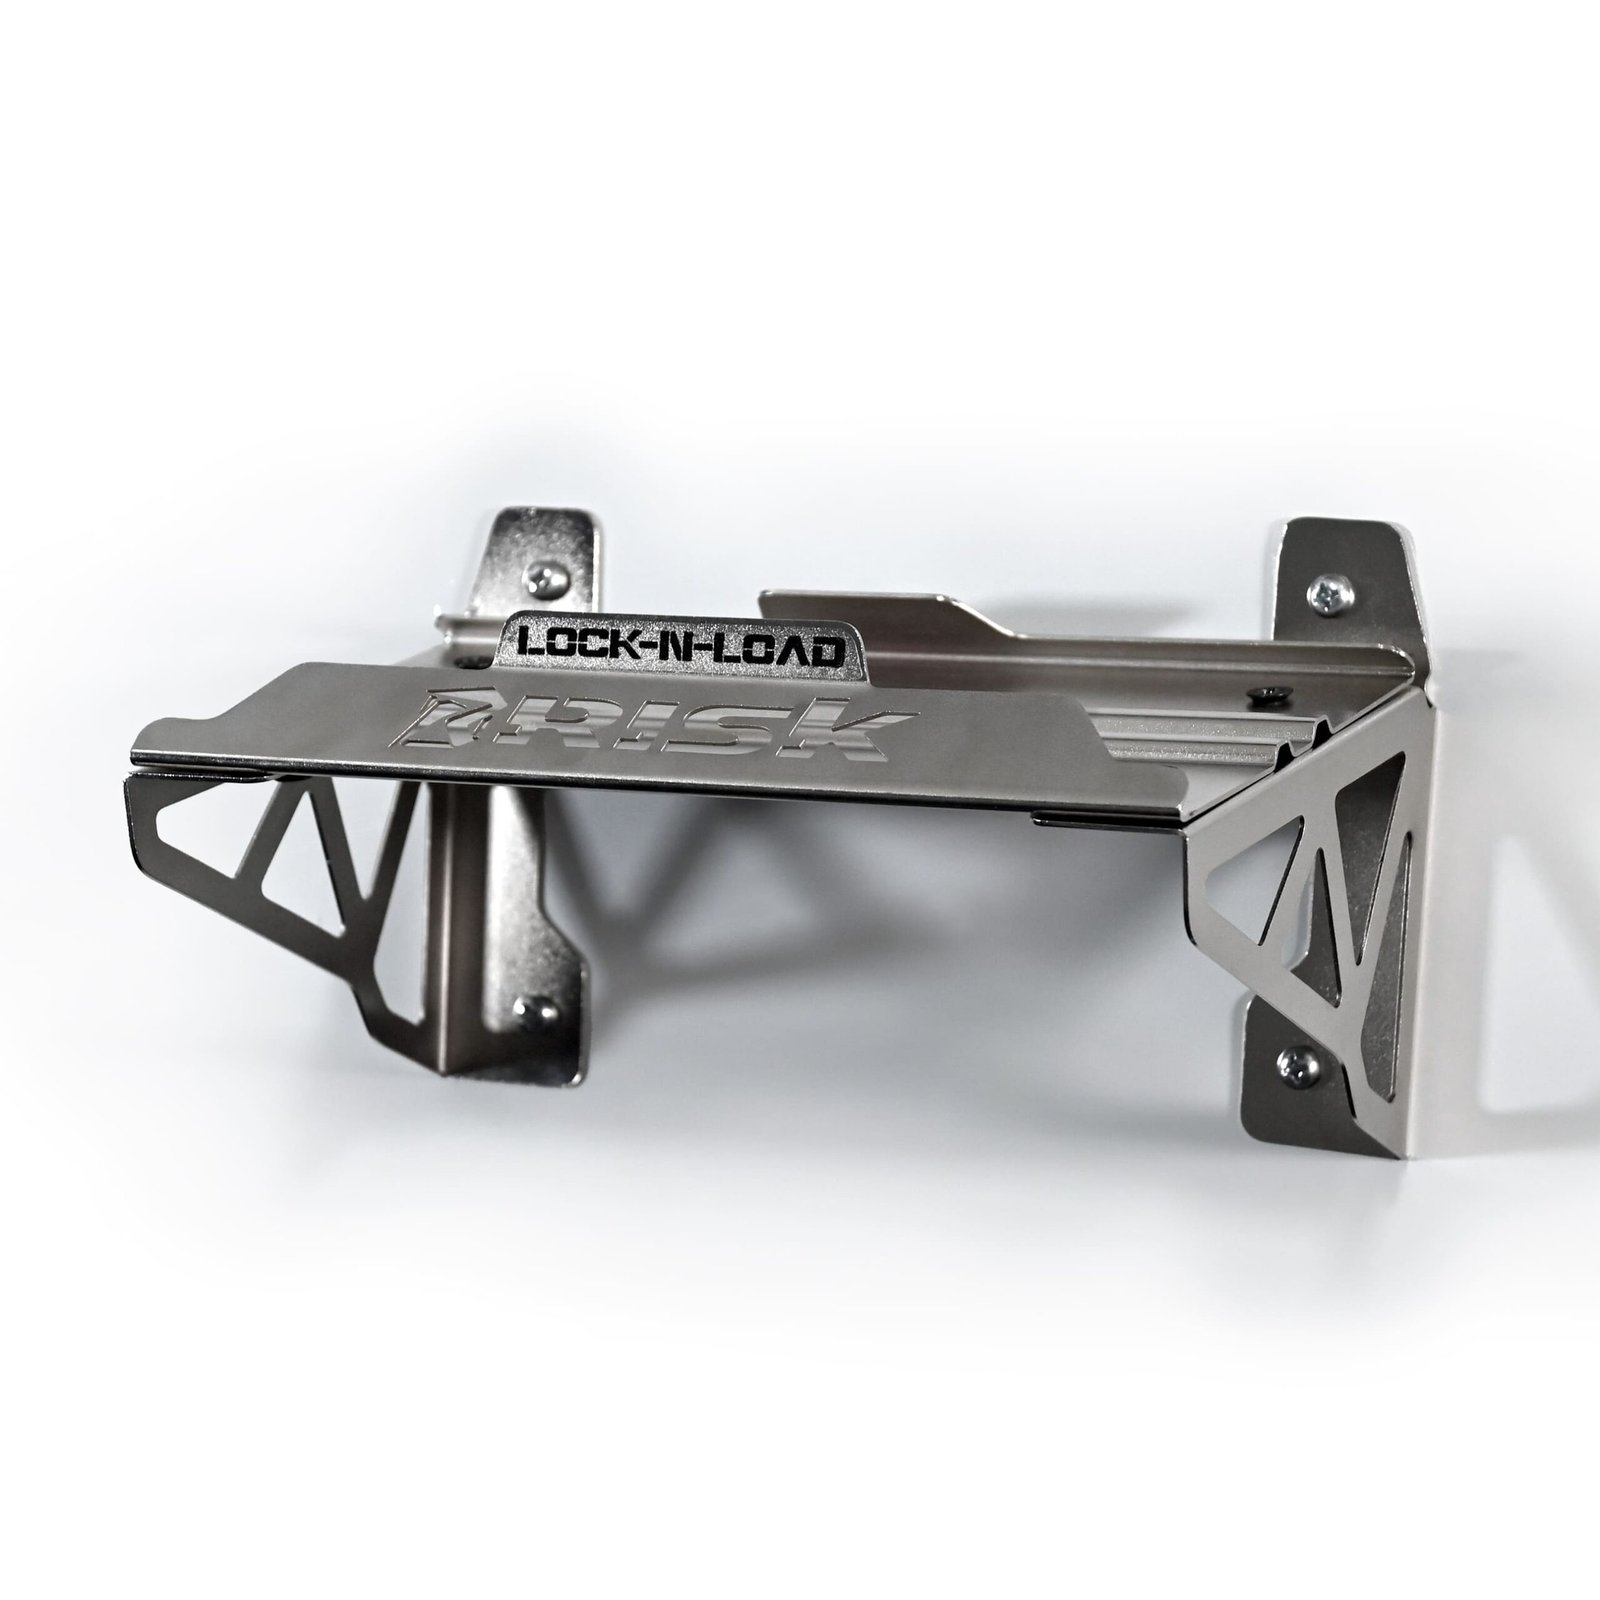
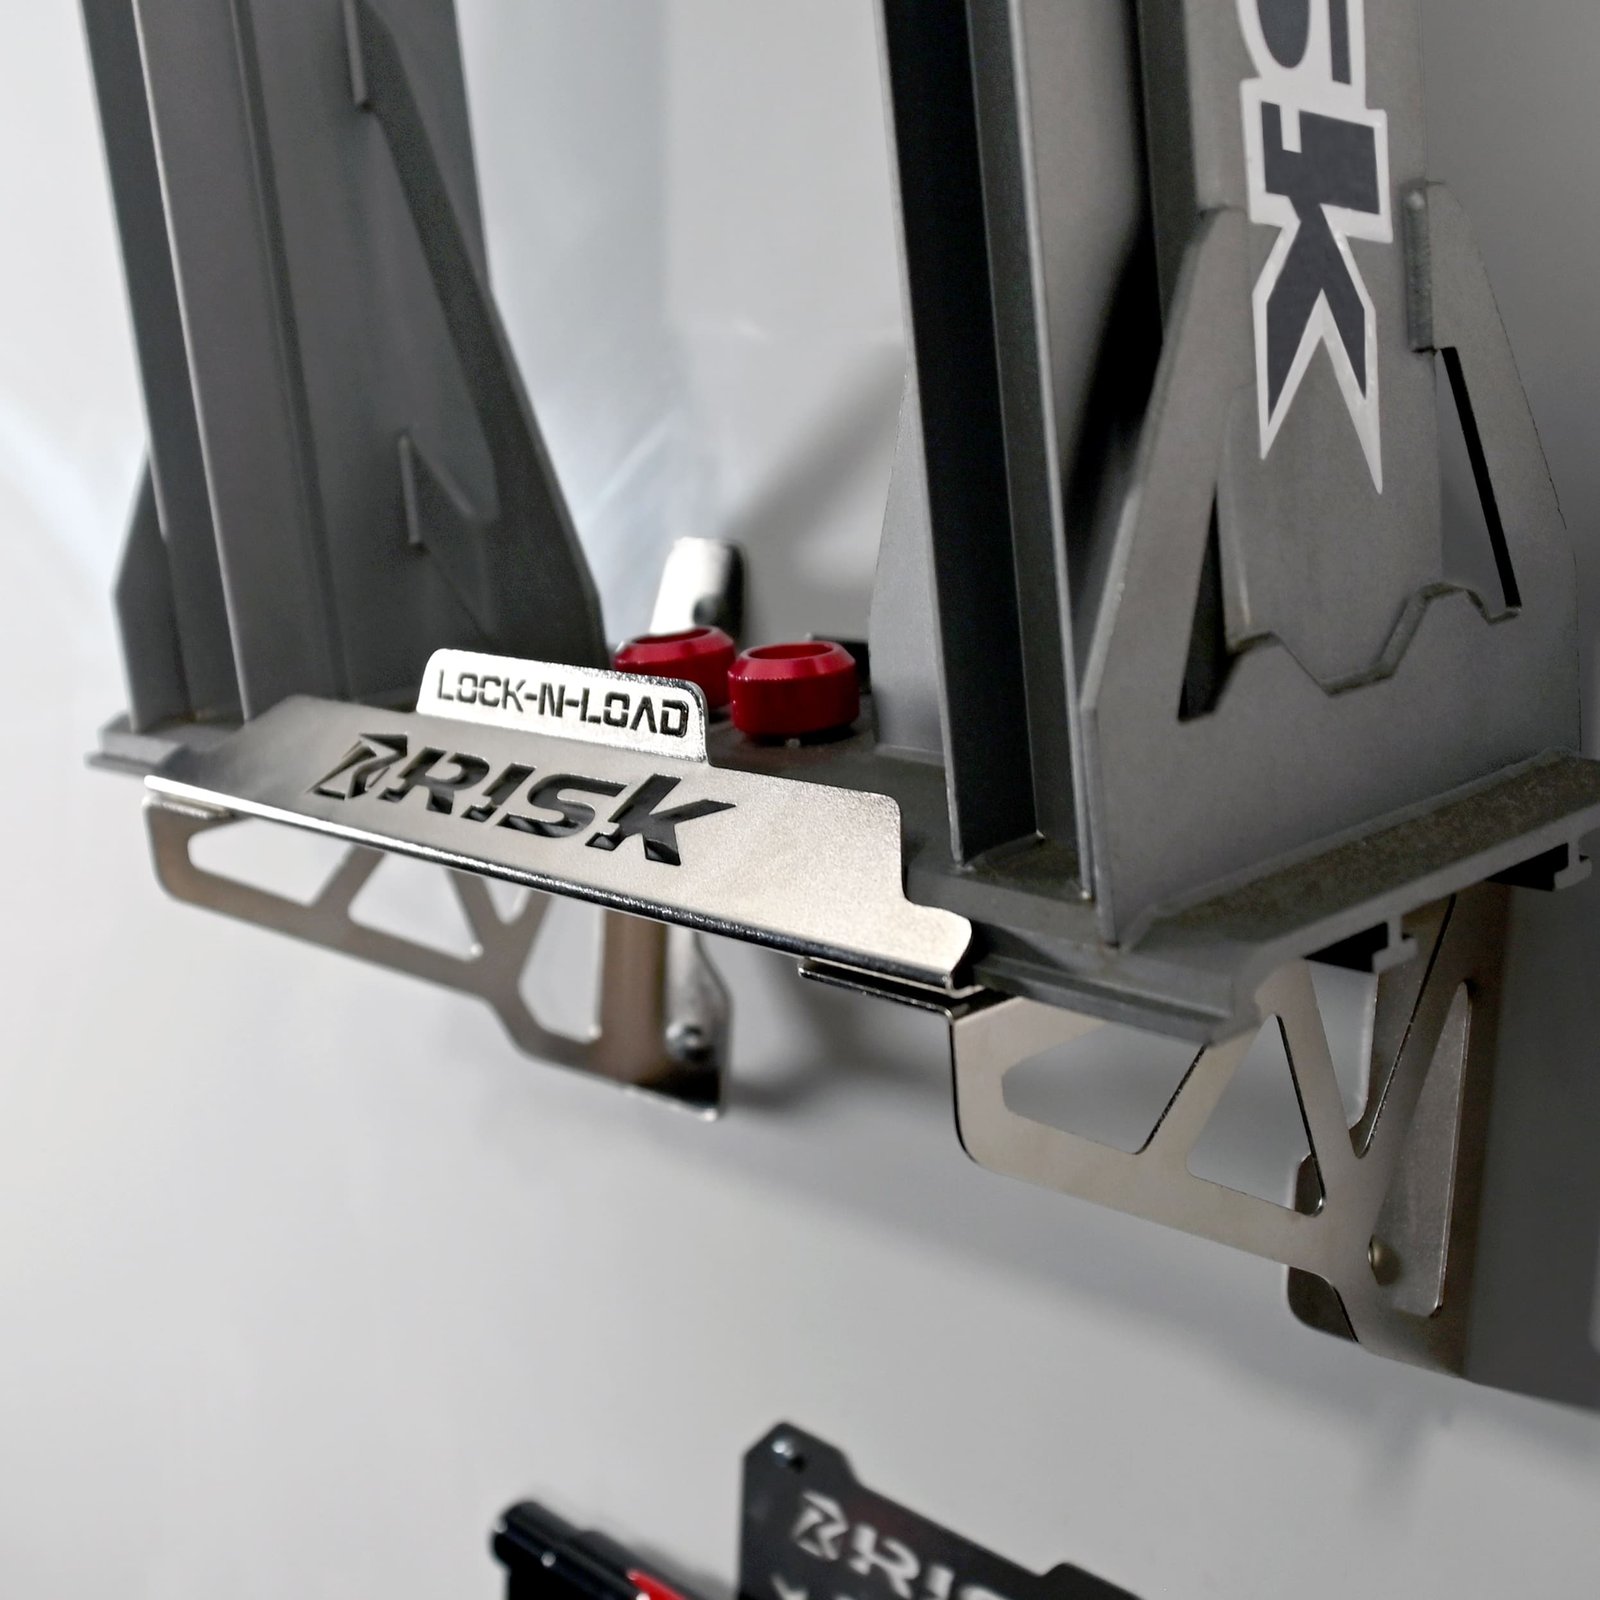
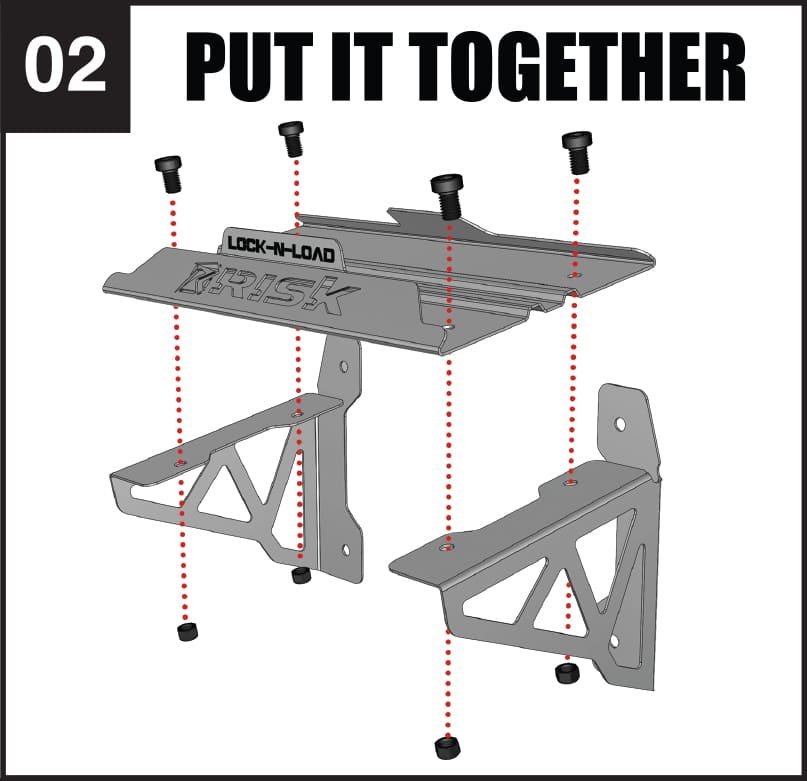
Step 2: Assemble the 3-piece mount system (1 shelf + 2 support brackets) per the included diagram.
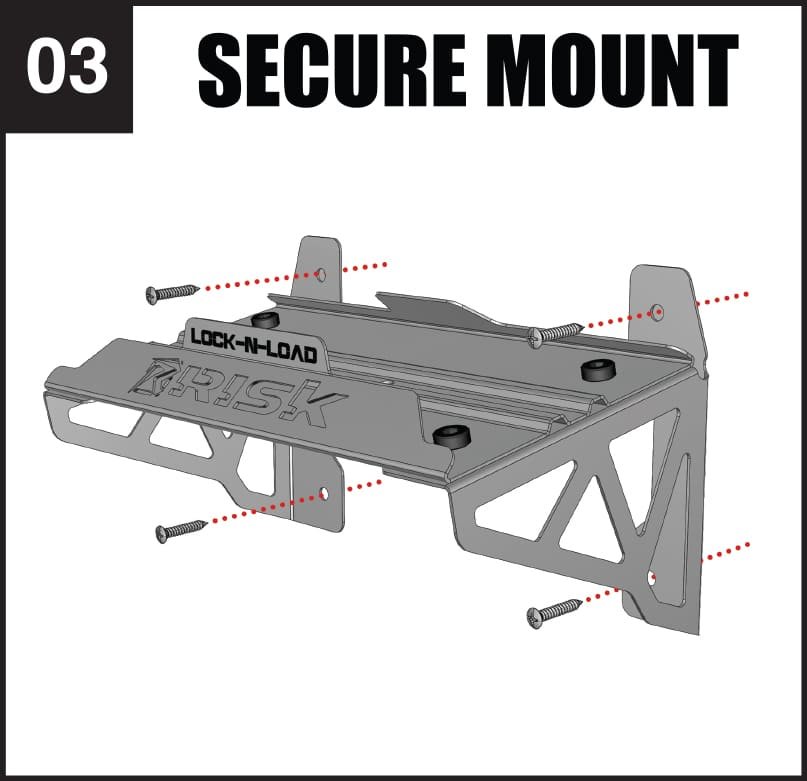
Step 3: Mark screw holes on the wall, use a level to confirm horizontal, drill pilot holes, and secure the mount into a solid surface.
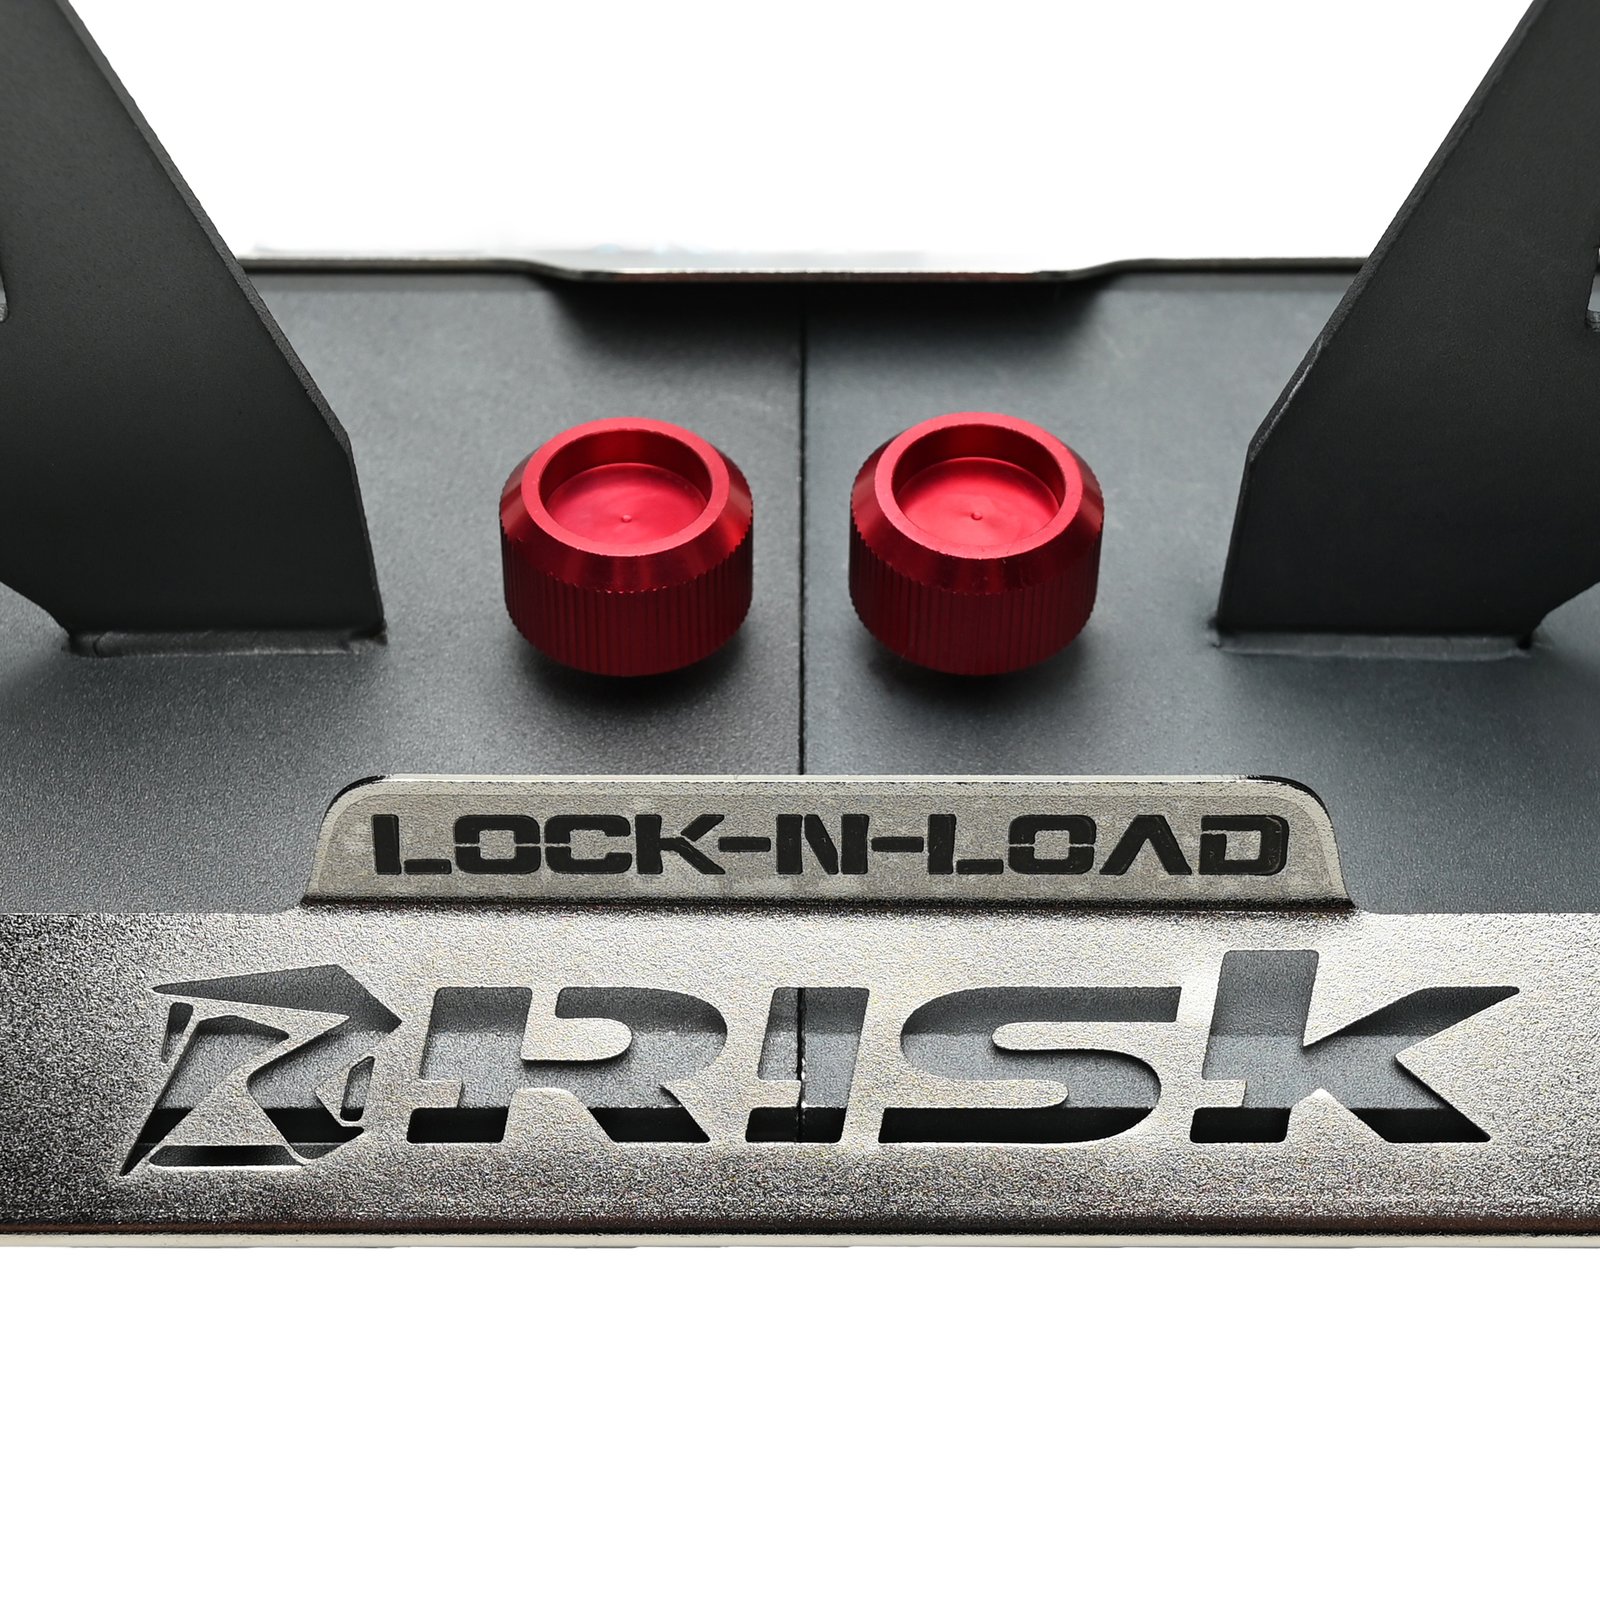
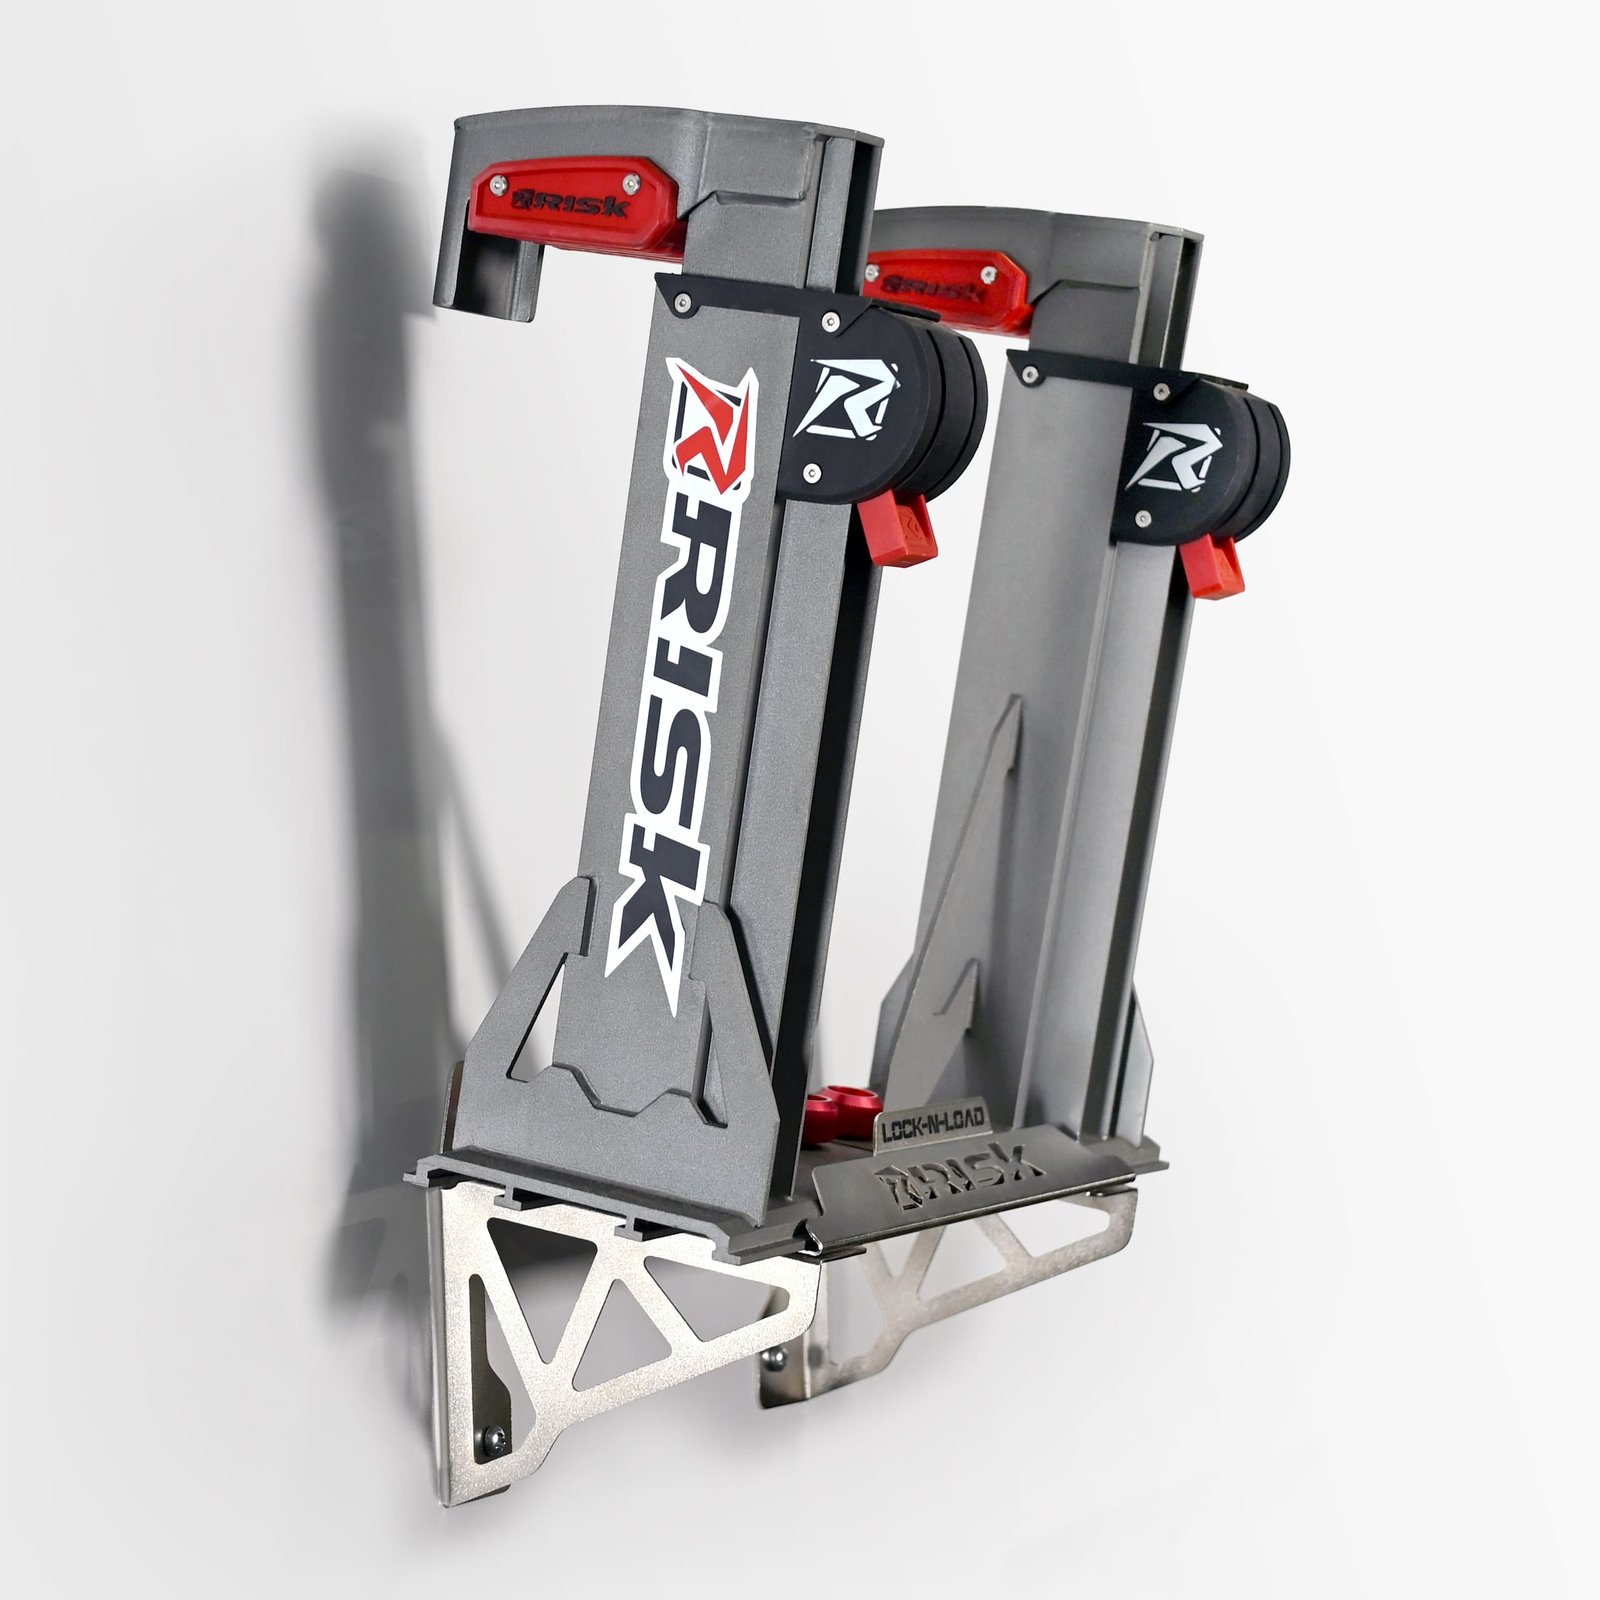
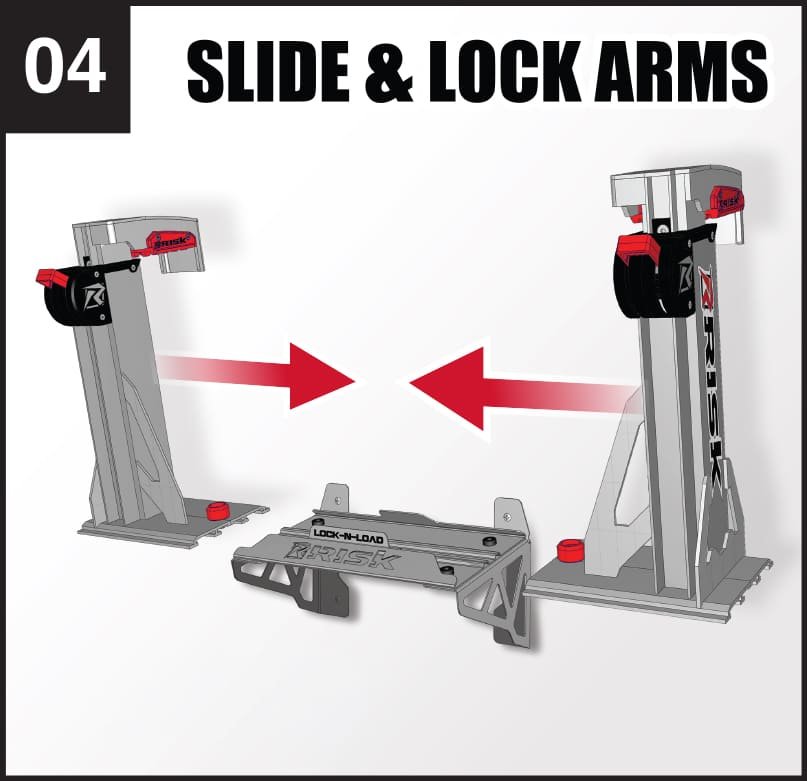
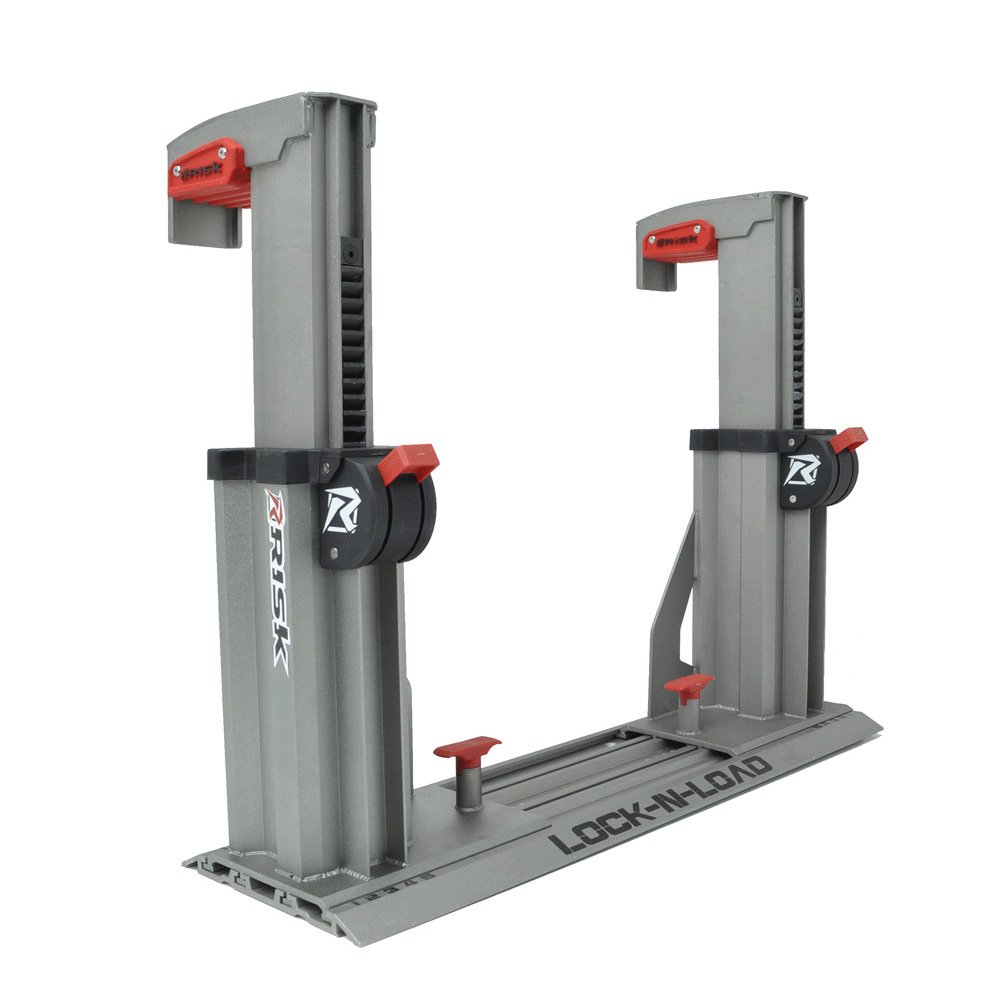
Step 4: Slide your LNL PRO arms onto the mount track, same inward motion as the floor mounting plate. Lock them in place using the arm lock pins.
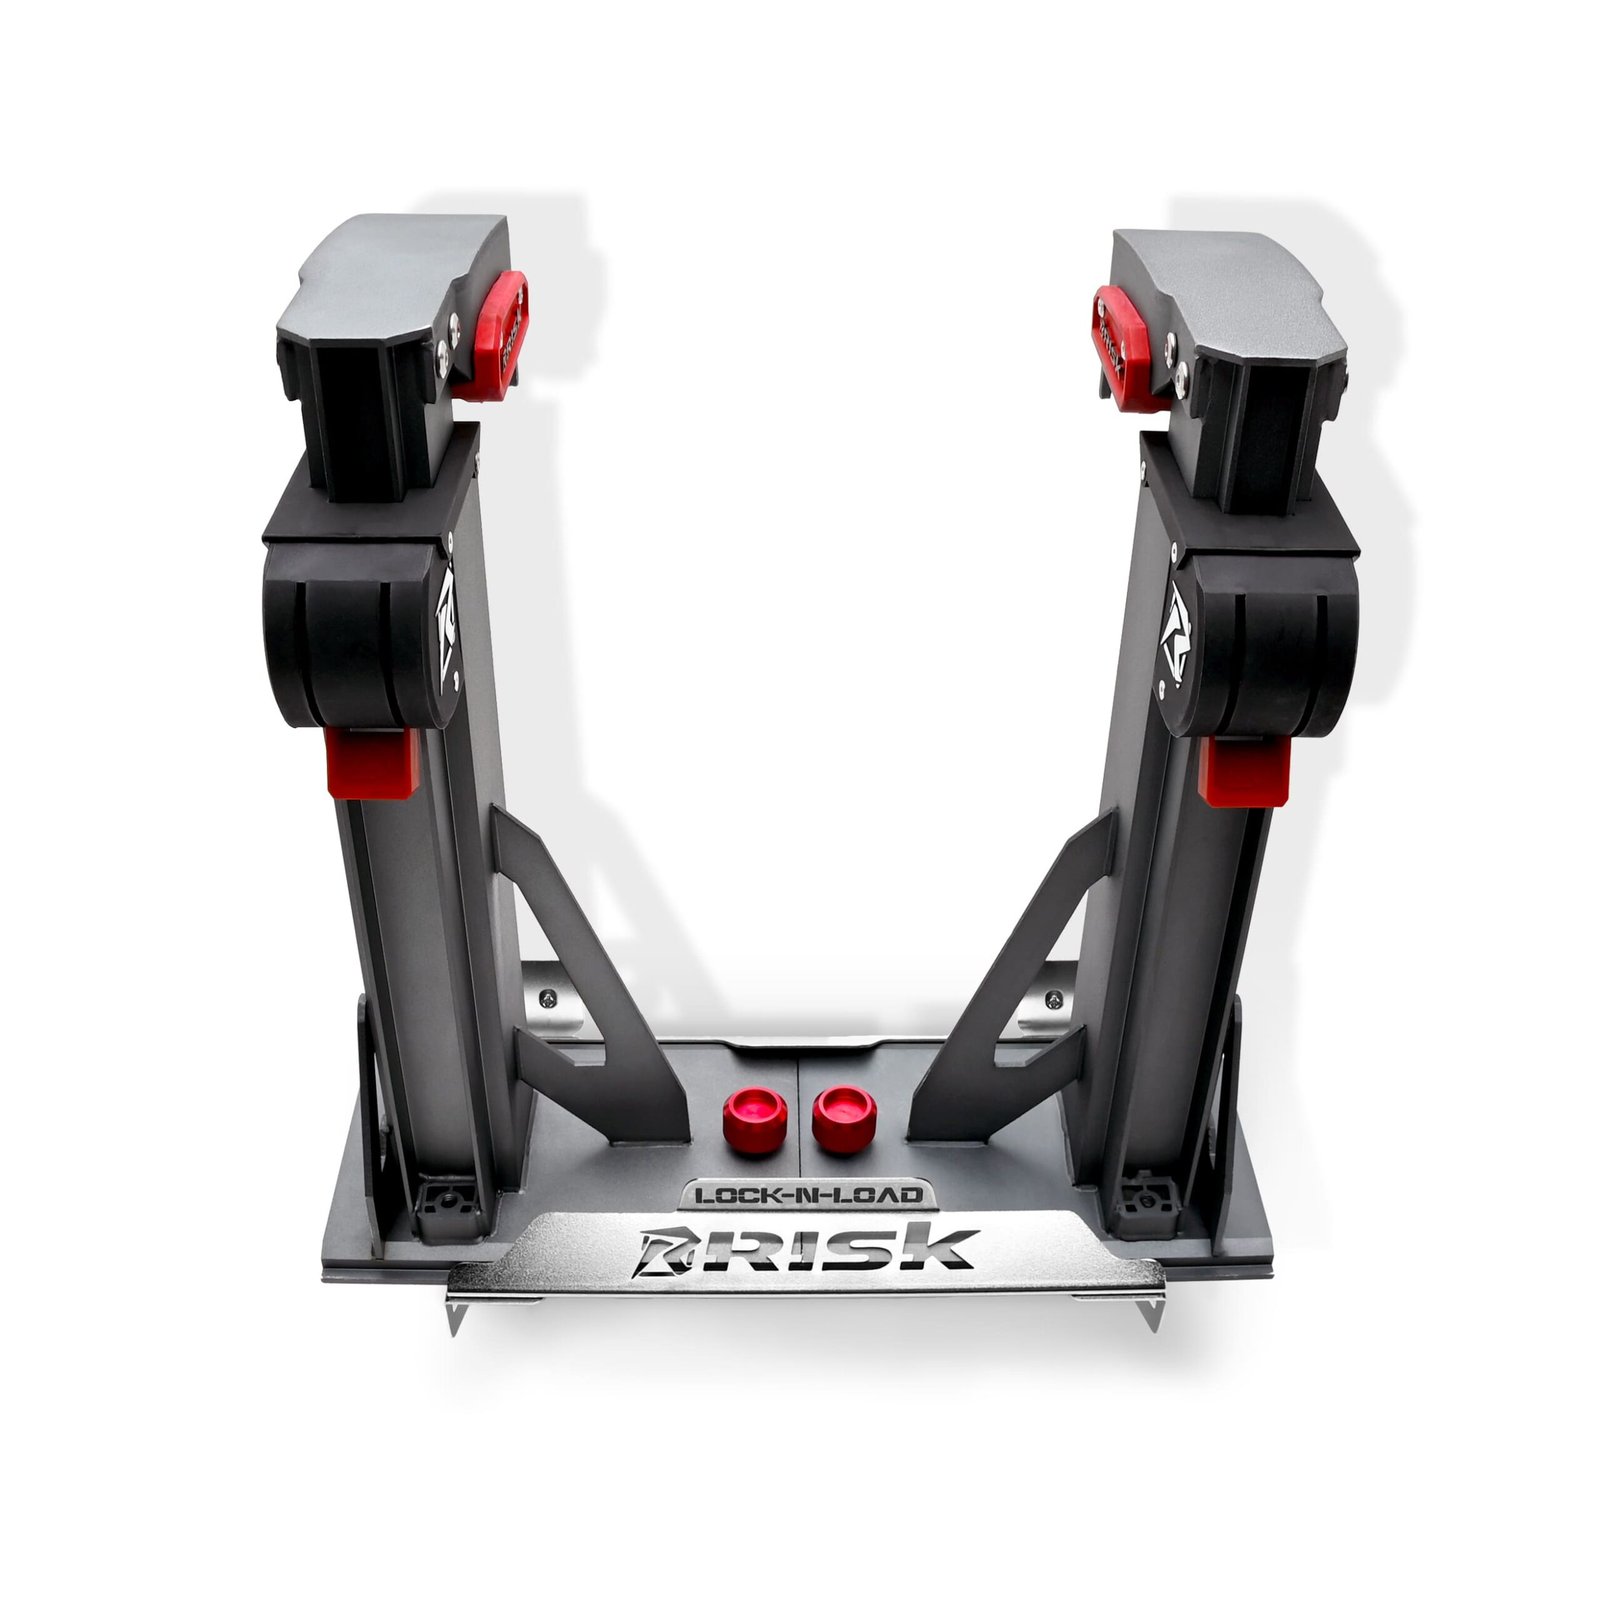
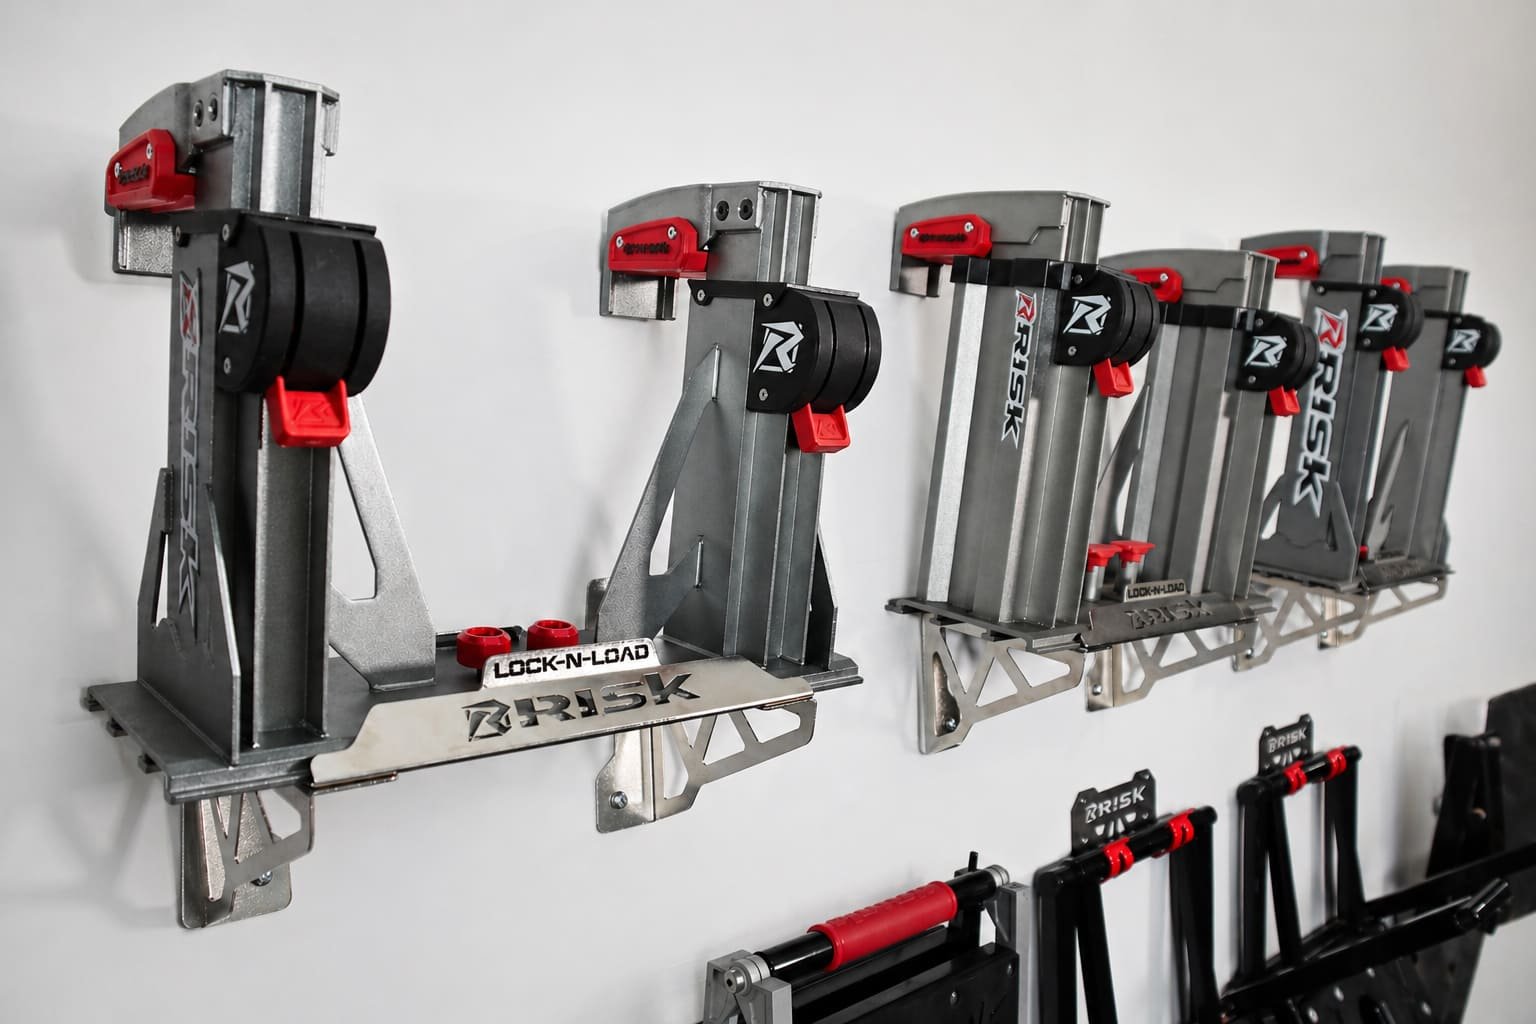
Off The Floor Plate. On The Wall.
Out Of The Way.
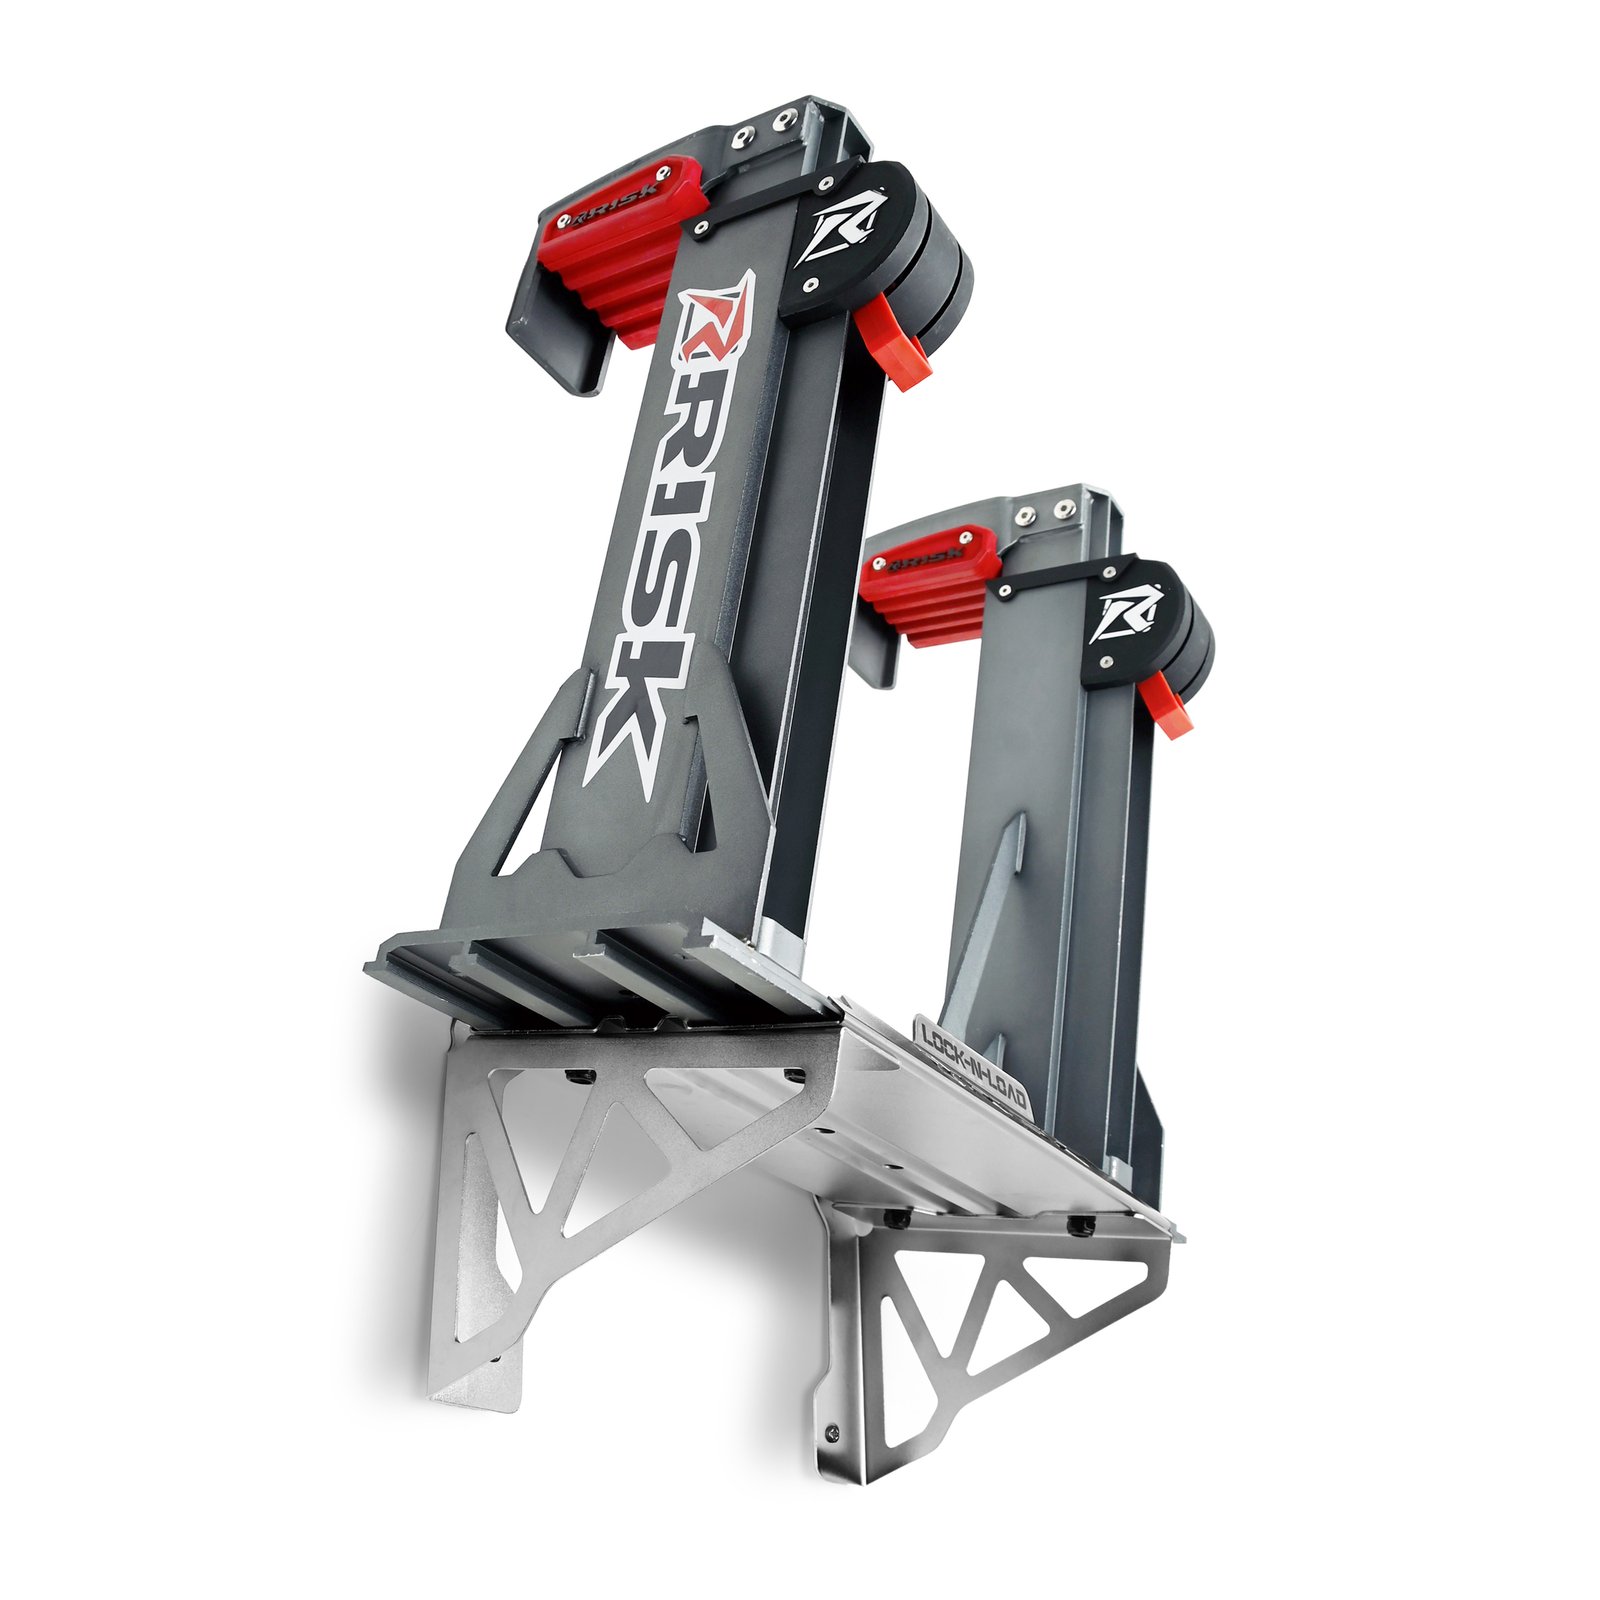
When the trailer is empty, your Lock-N-Load PRO arms still need somewhere to go. This wall mount gives them a home. Pull the arms off the floor plate, slide them onto the wall mount the exact same way, lock them in with the same pins, and you’re done. No learning curve. No extra hardware. Just clean storage until the next ride.
From The Box To The Wall
Step 1: Choose Your Spot
Pick a location that clears bike handlebars, foreheads, and other equipment. The arms will project from the wall at a slight angle.
Step 2: Assemble The Mount
Bolt the 3-piece system together (1 shelf plus 2 support brackets) following the included diagram.
Step 3: Level & Secure
Mark your holes, confirm level, drill pilot holes, and fasten the mount to a solid surface.
Step 4: Slide & Lock
Slide your LNL PRO arms onto the mount track, same inward motion as the floor plate. Lock them in with the arm lock pins.
Watch It Install
You Already Know How To Use It
The arms slide onto this wall mount the exact same way they slide onto the floor mounting plate. Slide them inward to your desired position, then lock them in with the arm lock pins. If you already own a Lock-N-Load PRO, there is nothing new to learn.
Pull the arms off the floor plate after a haul. Slide them onto the wall mount. Done. The floor plate stays installed and stays low-profile until you need it again.
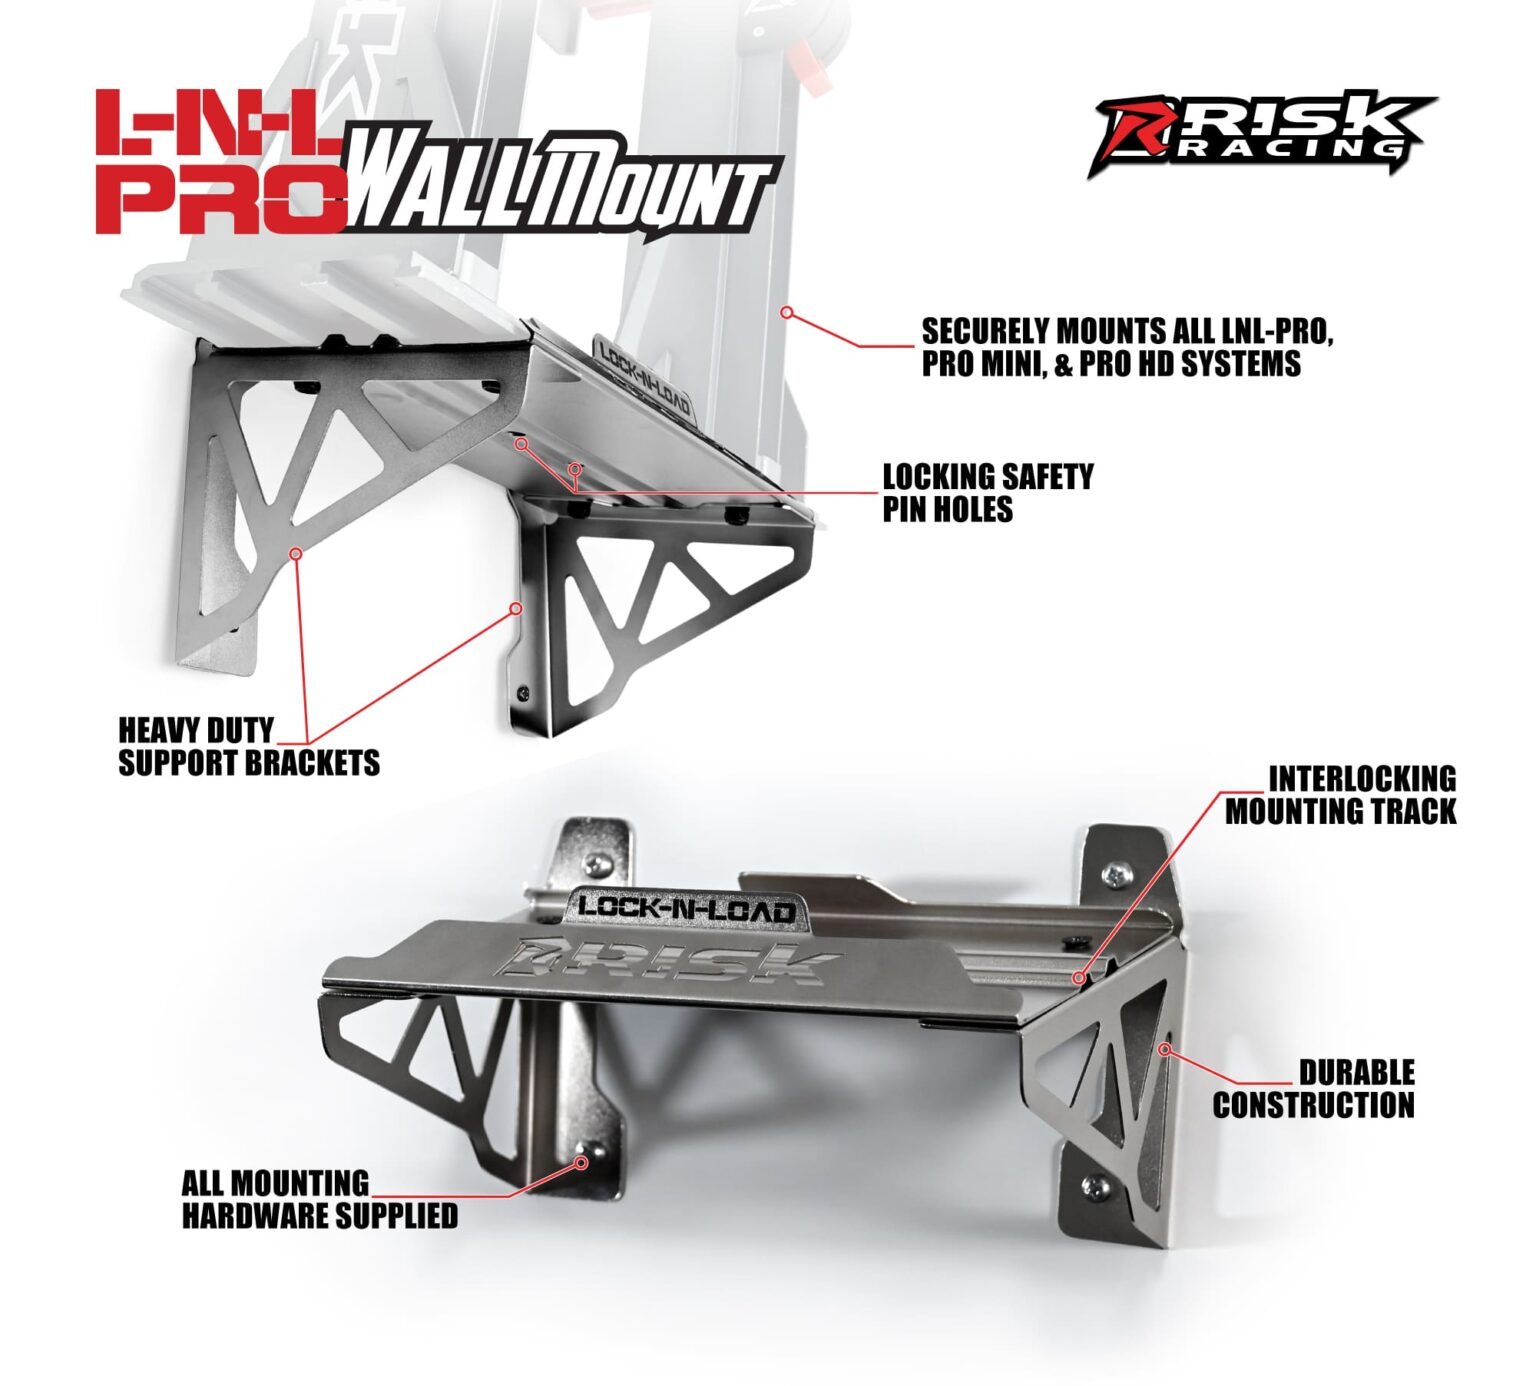
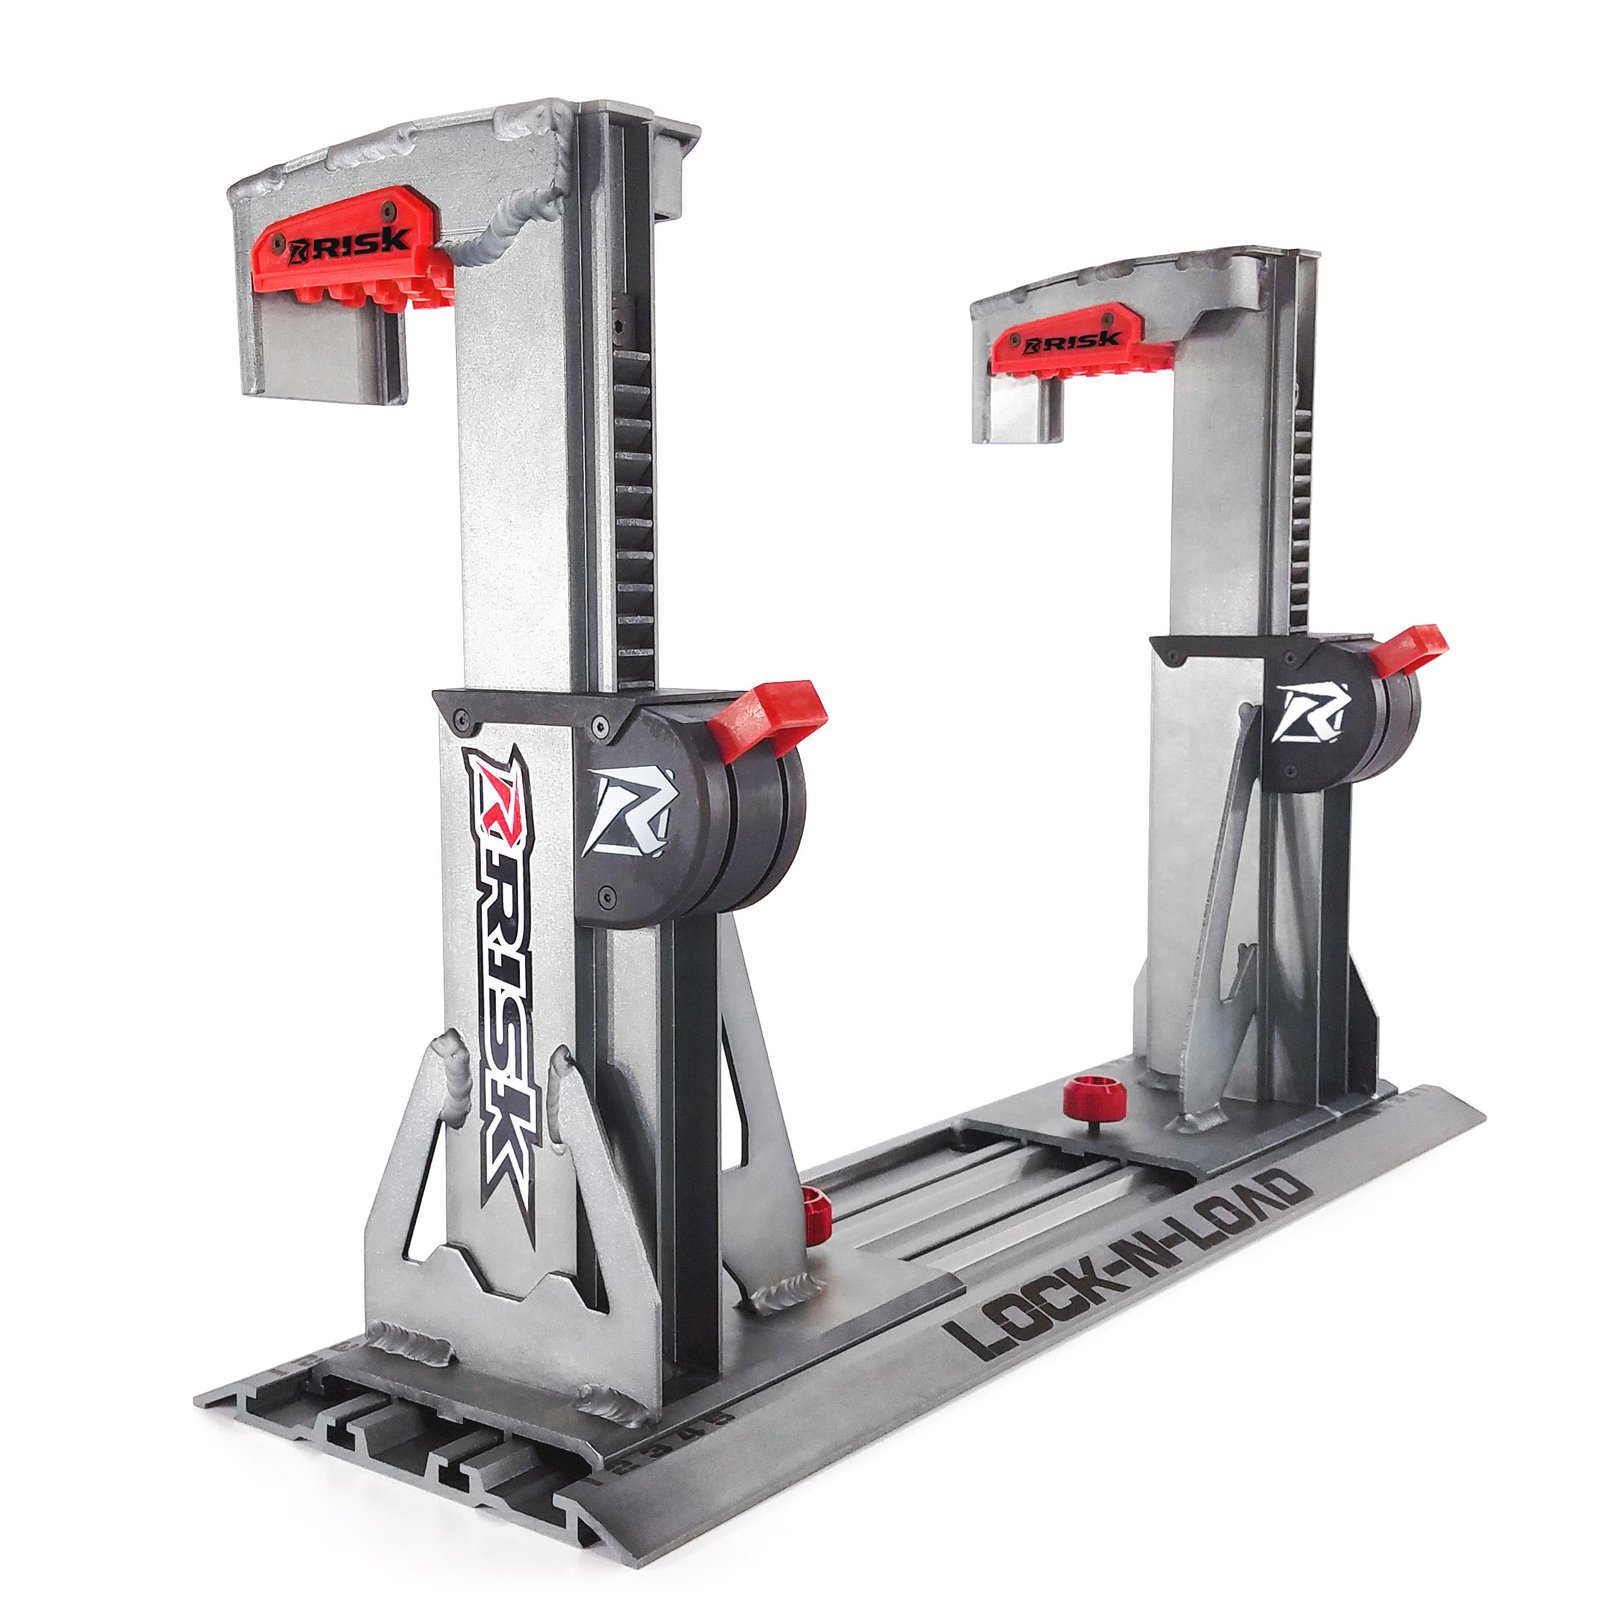
Fits The Whole LNL PRO Family
The Lock-N-Load PRO Wall Mount is compatible with the Lock-N-Load PRO, PRO Mini, and PRO HD transport systems.
It is not compatible with the original Lock-N-Load strapless systems (non-Pro versions). If you are unsure which system you own, check the model name on your floor mounting plate.
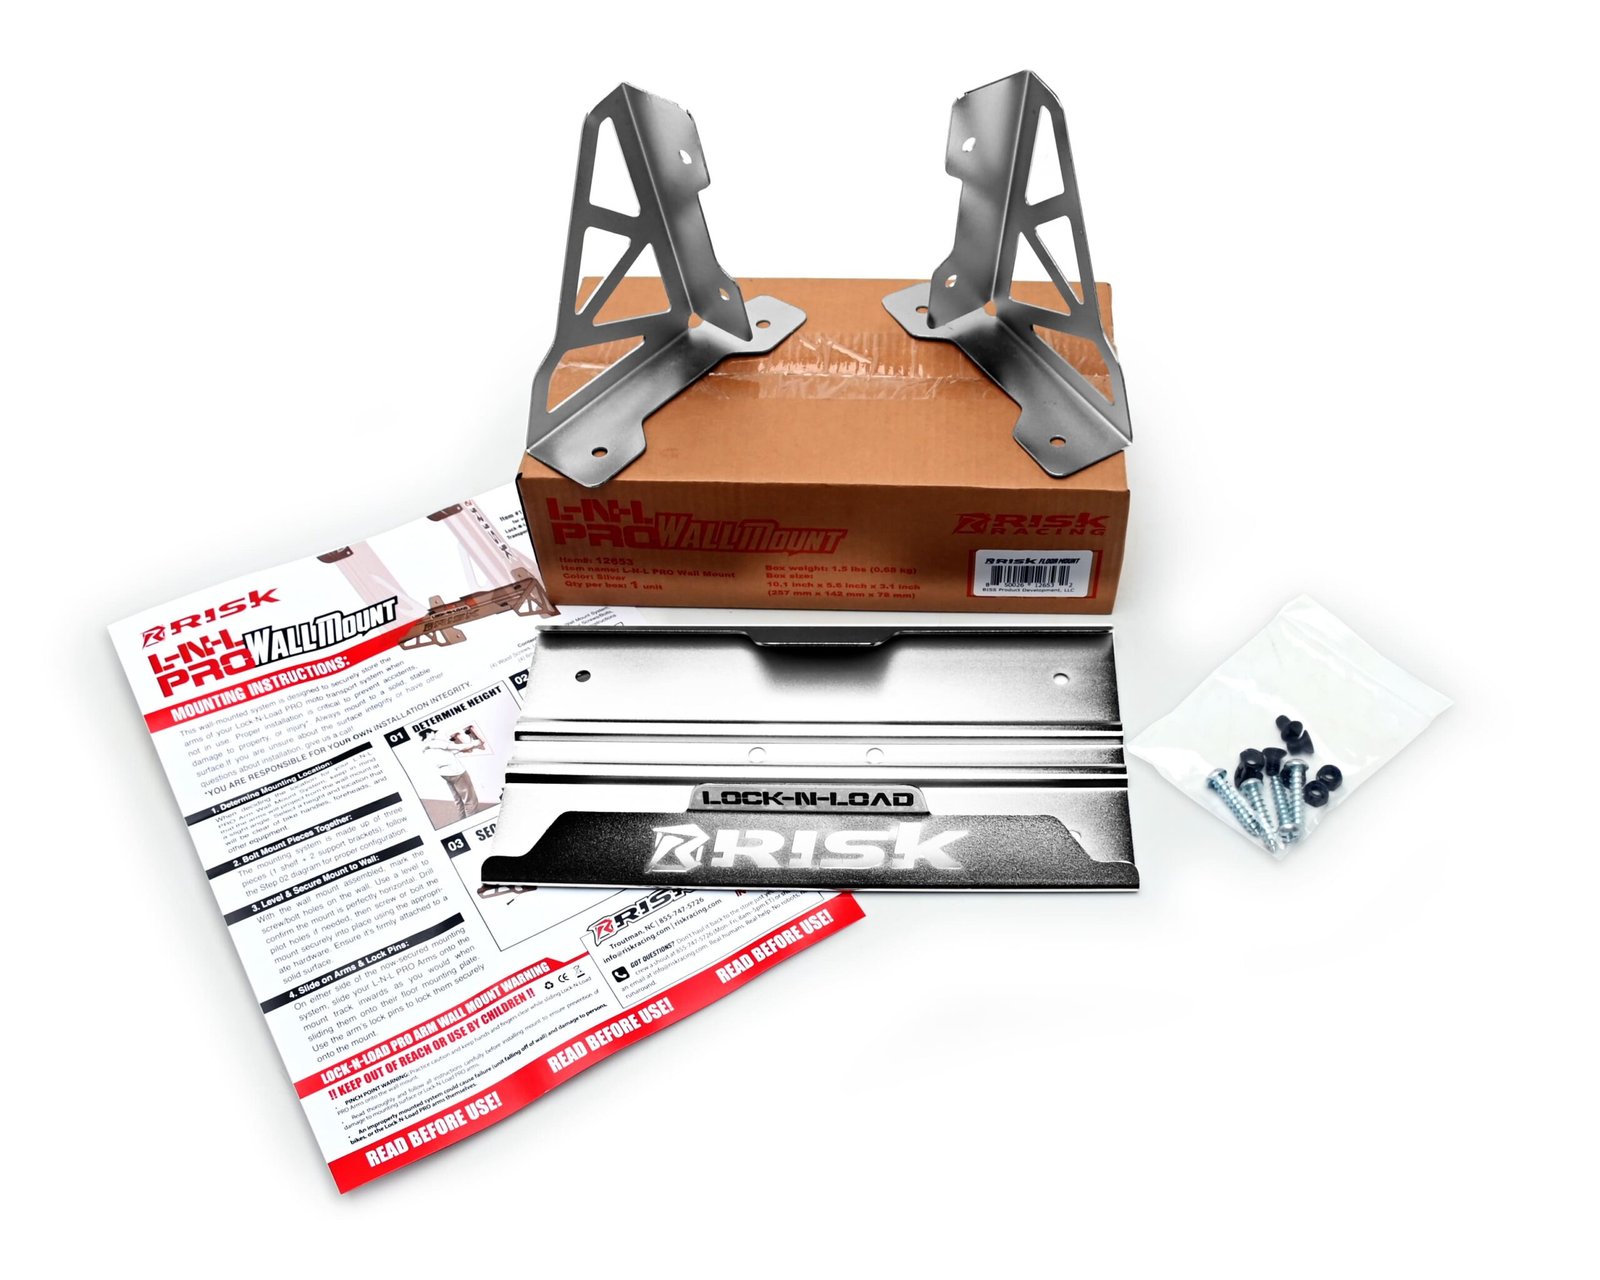
What's Included
(3 Piece) Wall Mount System • (4) Wood Screws • (4) Machine Screws/Bolts • (4) Lock Nuts • Installation Instructions
The Systems This Mount Is Built For
The Lock-N-Load PRO Wall Mount works with all three PRO transport systems.
Lock-N-Load PRO
Lock-N-Load PRO Mini
Lock-N-Load PRO HD
California Prop. 65 WARNING: This product can expose you to Bisphenol A, which is known to the State of California to cause birth defects or other reproductive harm. For more information go to www.P65Warnings.ca.gov.