Get Podium Winning Starts
Getting a holeshot is easy right? …Wrong, but most races are won and lost at the drop of the gate, so perfecting your starting technique is key to any MX racer who wants to be on the podium. Improve your reaction time and learn to control power out of the gate and into the first corner.

Practice Made Easy
Remote Start
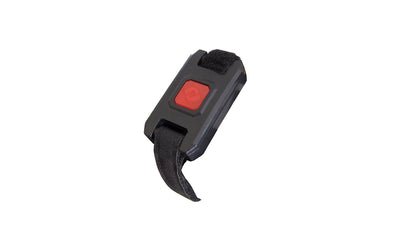
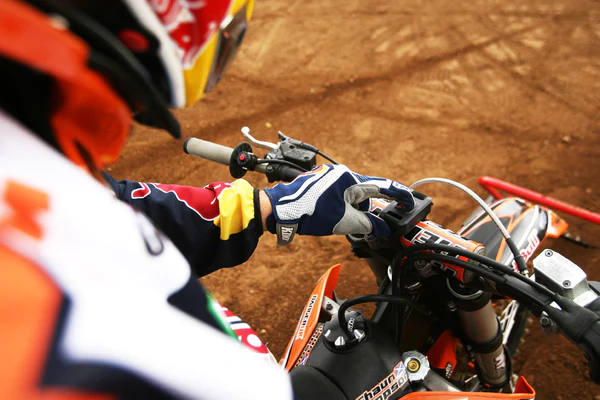
The “Holeshot” is a completely random timed, electronic, wireless, practice starting gate. This innovative product allows riders to independently practice their starts. When the rider presses the wireless remote button mounted on their crossbar pad, it will activate a computer controlled timing sequence which will drop the gate randomly.
Random Timing
After the remote button is pressed a green LED will illuminate on the gate. This lets the rider know the gate has received the signal and gives the rider 2 seconds to get his or her hands back on the bars. The LED will then turn red and start blinking. When it starts blinking it is like the 30 second board turning sideways. Get ready becuase the gate will now drop randomly between 1-5 seconds, just like an AMA Pro National!
Reset
Resetting the gate is as easy as riding by and stepping on the backside of the hoop without dismounting. Multiple gates can be electronically linked for multi-racer, bar banging practice. Simply plug multiple gates into each other using the supplied linking wire and all the gates will drop at the same time using a random timed signal from one remote button.
Instant Drop
The Holeshot also has a new “Instant Drop” feature. If you are using a trainer, parent or riding buddy to practice your starts and want to bypass the random timing sequence in order to control the drop sequence, you can plug the remote button directly into the gate. Simply plug the 6 foot long cable supplied with your gate directly into the remote button and into the ride side of your gate. This will automatically eliminate the wireless signal and random sequence. The gate will drop as soon as the button is pressed.
Link Multiple Gates
Linking multiple gates is easy for bar-to-bar practice simulating race environment starts!


Great for Quads
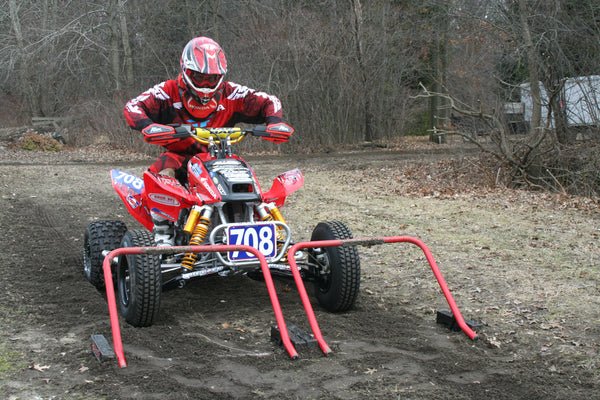
By linking two Holeshot Race Gates together it’s easy to practice race starts on your quad too.
Pro Circuit Training with the Holeshot Gate
Used by top Pro Race Teams


Features
Random timing drop sequence
Electronically controlled
Wireless signal – Rider operated
Link multiple gates for “bar-to-bar” practice.
“Instant Drop” feature for use with trainer
Very durable construction – used by the Pros
Easy reset
Works with Quads too
Getting the Holeshot = Getting the podium…
What's Included

Holeshot Race Gate

Remote Button
plus 1x linking wire, 1x 6′ “instant drop” cable, 4x mounting stakes
- Model# 77839
- 8 x AA batteries (not included)
- Wireless remote start button (included)
- Size: 36” x 29” x 5” (91.44cm x 73.66cm x 12.7cm)
- Weight: 18lb (8.2kg)
- 1 year warranty
Why is my gate not performing as designed?
- Please ensure you have installed a total of 8 NEW “AA” batteries (Old batteries from around the house will not work. The gate requires a full 12 volts to drop so new batteries are important). Make sure you have all 8 batteries installed correctly.
- Double check there is no corrosion on the batteries or within the battery pack, this can impede the amount of voltage the gate receives.
- Check the battery in your wireless remote. Replace the battery with a new battery and try again. The battery in the remote is a “23A”, which is common at most retail stores. It is like the battery in many garage door remote controls.
- The Holeshot Gate electronics may have “lost” the RF wireless signal from the wireless remote. If this has happened, you can typically reset the wireless signal by following the steps below.
How to reset the wireless remote?
- Switch the power button on the base of the Holeshot to the “off” position.
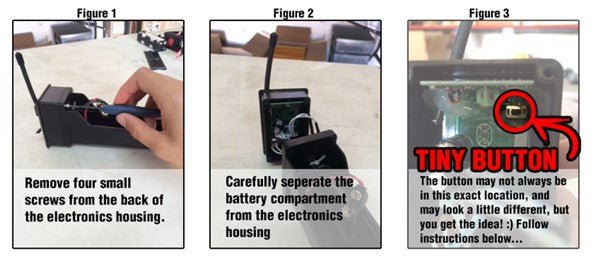
- Remove the electronics unit (i.e., the battery pack casing) from inside Holeshot gate (Figure 1).
- Unscrew the 4 screws on the back of the electronics unit, but **be careful not to yank it apart, because there are connecting wires inside** (figure 2).
- Inside the electronics housing you will find a tiny button similar to the button shown in figure 3 below. Press and hold this tiny button. While still holding the tiny button down, turn the power switch to the “on” position and let the lights flash through their sequence (**continue holding the “tiny button”**).
- When the lights stop flashing, release the “tiny button”, and push the red button on the remote.
- This should reset the remote to the electronics. To test, press the remote button again. The LED should now start its usual sequence, which is green for 2 seconds, then blinking red, etc.
- If the LED on the electronics lights up when you press the remote, then this has been a success! It is now time to high-five anyone in the room with you. If no one else is in the room, feel free to celebrate all by yourself.
- If the LED on the electronics didn’t react, try the sequence above again. It can be tricky, and you will wish you had three hands, but maybe it will work on the second, or third try.
- If that still doesn’t work, maybe you have a bug in the electronics.
*Please note: the internal electronics can be replaced if corrosion or faulty motor*
Videos
JGRMX Josh Grant
Brock Tickle
Zach Osborne
Lucas Oil/Troy Lee Designs/Honda Team Ben Townley Interview
Teaming up with Honda World Motocross
Harold Goodman practicing Quad starts
Original Demo Video
California Prop. 65 WARNING:
This product can expose you to Bisphenol A, which is known to the State of California to cause birth defects or other reproductive harm. For more information go to www.P65Warnings.ca.gov.


